Print Calibration Solutions
When it comes to printer calibration, to a Color Perfectionist “good enough” just isn’t. Creating custom profiles for expensive photo papers will consistently provide optimal color – saving valuable time, money and frustration. Color Perfectionists can now choose the ideal i1Studio or i1Pro solution for their experience, budget and specific needs.
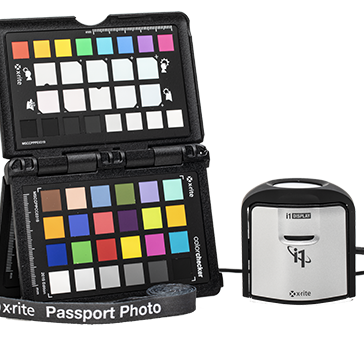
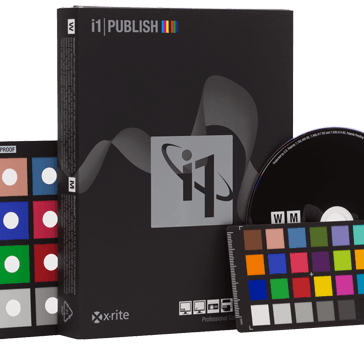
i1Studio
The NEW i1Studio from X-Rite is the start-to-finish color management solution for Color Perfectionists looking for expert results. Your prints will match your vision more perfectly than you ever thought possible.
i1Photo Pro 3
Professional Color Management for Photographers Who Printi1Photo Pro 3 is the new standard of perfection for “Color Perfectionist” Photographers looking for perfectly accurate color from capture through edit, sharing and printing – the first time and every time. Quickly and easily create custom camera, monitor, projector, scanner and RGB printer profiles, ensuring the colors you capture, view and print are true.
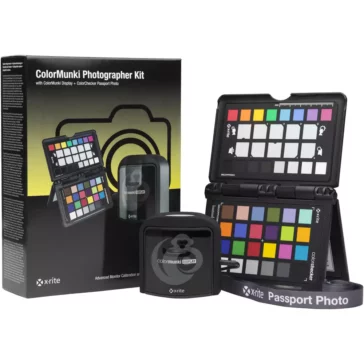
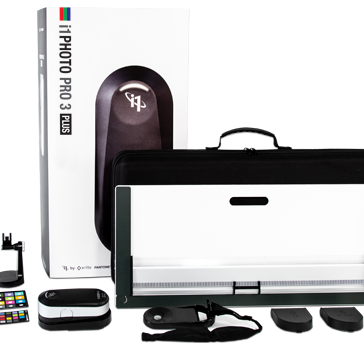
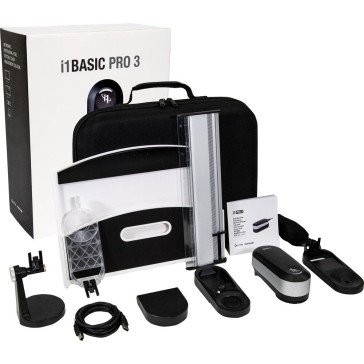
i1Photo Pro 3 Plus
Professional Color Management for Photographersi1Photo Pro 3 Plus is ideal for “Color Perfectionist” Photographers looking for perfectly accurate color from capture to print. Quickly and easily create custom camera, monitor, projector, scanner and RGB printer profiles, ensuring the colors you capture, view and print are true.
X-Rite i1iOSpending too much time reading test charts? Extend the power of your i1Pro with this automated hands-free test chart reader. Simply plug in your device, align the test chart, and the scanning table does all the work.The i1iO for the i1Pro 3 is a robotic, automatic, chart reading system designed for photographers, designers, and printers who want to eliminate manual strip reading of printer test targets.
i1iSis 2 Automated Chart Readers
Your time is valuable. If you spend it measuring charts, consider the i1iSis 2 spectrophotometer with optical brightening compensation and M-series measurement illumination conditions. i1iSis 2 is an incredibly fast, automatic chart reader for high-production, high volume custom printer profiles.9 Steps to Accurate Printer Color
n order to produce the most accurate and high quality prints, you need to create individual printer profiles for each printer, ink and paper combination. Printer profiling is the process of optimizing your specific combination of ink, paper and printer settings.
In short, there are three steps to creating a printer profile:
1. Print a set of target colors2. Measure those colors using a calibration device3. The software calculates and creates a custom ICC profile for that specific combination
1. Printing your target chart
Your printer profiling software will generate a target chart for you to print. Depending on the software, you may be able to choose different sizes of charts. The number of color patches will depend on the printer and paper type to be used. Also, different profiling software programs will allow different patch numbers to be printed.
TIP: It might seem obvious – but you should print on the paper you want to create a profile for!
2. Get the settings right
When choosing to print, you need to ensure that your printer driver settings are the right ones, and that you continue to use these settings when you print onto this paper in the future. Some key things to consider are:
Do a nozzle check before printing any color targets. This can be done on any paper type, even inexpensive copier paper.
Make sure your printer is taking control of ‘color matching’. DO NOT select Colorsync and switch off printer driver color management
Select the correct paper type. If you are not using a branded paper corresponding to the manufacturer of the printer, the paper brand will include a recommendation of the most suitable paper type to select.
Select the quality and speed modes you will use when printing to this paper
3. Let it dry
You will judge a print when it has dried so you need to ensure the ink has dried before measuring the colors into the software. We recommend at least 10 minutes drying time for the paper, but an hour would be even better. If the paper is not from the printer manufacturer, more drying time is usually beneficial.
4. Calibrate your reading device
Some measurement devices will have an internal calibration tile, such as ColorMunki Photo. The i1Pro and i1PRO2 will have separate calibration tiles that are mated to the measurement device. This enables you to calibrate ‘white’ on the device before starting the measurement process, ensuring the accuracy of your measurements.
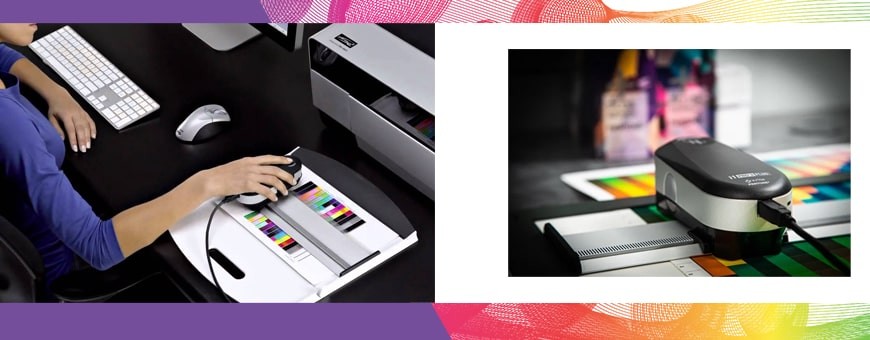
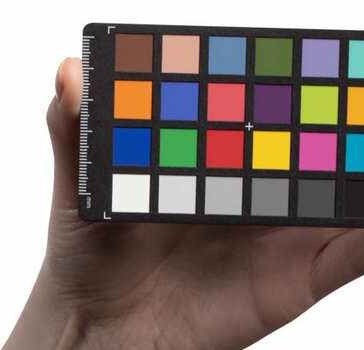
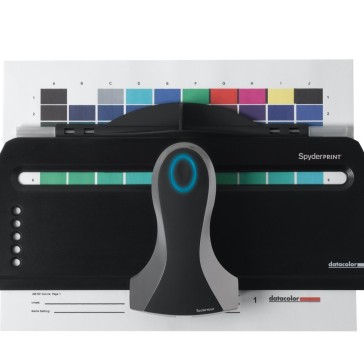
5. Measure the target sheet
Measure each row of colors. The included color management software that comes with your measurement device (spectrophotometer) will show you the progress along the way. You’ll need to measure each row of your test target before being able to calculate your custom profile. The image below shows the i1studio measuring a printer test target. This device is also capable of calibrating your monitor or projector.
6. Select a lighting condition
Certain color management solutions allow you to choose a lighting condition for your printer profile. This should be matched to the lighting condition under which the prints you will be creating will be viewed. In most instances the standard D50 (Daylight) is fine. If you have in i1Pro or i1Pro 2 device and are using i1Profiler software, you can even measure the ambient light where your print will be displayed – providing an even higher level of color accuracy under this viewing condition. If your solution doesn’t have a lighting option in the profiling software, then Point 9 is important.
7. Give your profile a meaningful name!
Set a name for your profile that is easily understandable and recognizable. When you go to print from your chosen application, it should be easy to locate so you don’t apply the wrong profile to the wrong paper.
8. Select profile from within application
It’s important to always set the profile from within your chosen imaging application and don’t let your printer take over the color management. This profile selection will be part of the print dialogue in Adobe Photoshop or similar applications.
9. Viewing the printComparable to monitor calibration, determining the illumination of how a digital image is displayed, the visual appearance of a correctly profiled print is very much determined by the illumination conditions in which it is viewed. It is accepted that images look best when viewed under daylight conditions and illuminated to an optimum brightness level. In addition to professional viewing booths, there are table-top lamps that can offer some degree of lighting control.
Automate RGB and CMYK Printers to get accurate colors in your production workflow. Reduce the gap between multiple colors and get exactly what you see. Professional X-Rite color calibration tools are just prefect to save time and money for improved high volume printing.
![X-Rite ColorMunki Design MEU115 [2022 Edition]](https://www.designinfo.in/wp-content/uploads/nc/p/1/1/7/5/2/11752-364x364-optimized.jpg)
![X-Rite ColorMunki Smile CMUNSML [2022 Edition], Starter Kit for Monitor Calibration](https://www.designinfo.in/wp-content/uploads/nc/p/1/1/7/5/4/11754-364x364-optimized.jpg)
![X-Rite i1 ColorChecker Photo Kit (Display Studio + Passport 2) [2022 Edition]](https://www.designinfo.in/wp-content/uploads/nc/p/1/9/1/4/0/19140-364x349-optimized.jpg)
![Pantone Capsure X-rite RM200-PT01 Handheld Device [2022 Edition], Color Detector & Color Matcher](https://www.designinfo.in/wp-content/uploads/nc/p/4/3/8/0/4380-364x364-optimized.jpg)


